.gif)

Imagine you've built a scalable application to meet privacy, load, and configuration requirements. As your application's scope expands, so do the technical demands, which may require acquiring DevOps skills.
But what if you're at the Proof of Concept or startup phase and don't yet have a dedicated DevOps resource? In these cases, launching complex applications can still be successful.
In this article, our Software Engineer, Bogdan Jaminski, explores strategies for achieving this by using the right tools via DigitalOcean to expedite the process and overcome obstacles.
For this article, we aim to create an application that meets all requirements, ensuring a robust and smooth user experience.
The application will possess the following features:
- Automated Deployment: Every commit to the main branch triggers an automatic deployment process, ensuring fast and reliable updates.
- Environment Variable Support: The front-end and back-end will support environment variables, enhancing flexibility and configurability.
- Secure Database Connection: Establish a secure and encrypted database connection with the server to safeguard sensitive data.
- Scalability Across Instances: The application's architecture allows easy expansion across multiple instances to meet growing demand.
- Database Scalability: The database infrastructure will be designed for scalability, enabling efficient distribution across multiple instances.
- Real-time Monitoring: Implement real-time monitoring of server and database resources to gain insight into the system's health.
- Alert Notifications: Prompt email or Slack notifications will be sent during server overloads or issues to ensure a quick response.
- Log Access: Provide access to comprehensive logs for in-depth analysis and troubleshooting.
- Server Console Access: Users can access the server console using SSH or an equivalent protocol for seamless interaction.
- CORS and Domain Configuration: Fine-tune Cross-Origin Resource Sharing (CORS) and domain name configuration parameters for smooth interaction.
- Version Rollback: Include a mechanism for reverting to a previous version, enabling effective rollbacks when needed.
- Zero Downtime Deployment: Optimize deployment processes to guarantee continuous service availability during updates.
Code preparation
First, ensure that the front-end and back-end servers are compatible with the DigitalOcean service we intend to use. Keep in mind these essential requirements:
- Build and run scripts: Implement, build, and run scripts as a top priority. These scripts should be defined and read from the package.json file. Additionally, ensure that the required dependencies are specified in the
package.jsonandpackage-lock.json (or yarn.lock)files. - Version control: Host your projects on GitHub or GitLab. This choice will significantly streamline the interaction with DigitalOcean, making it more efficient and organized.
By adhering to these requirements, you'll be well-prepared to work seamlessly with DigitalOcean for your server setup.
Front-end preparation
You can create scripts using package managers like npm and yarn, to generate the necessary files. However, we'll explore a more straightforward approach using a project generator. I recommend using npx, a globally available package in the latest versions of.
npx create-react-app awesome-startup-webTo check if the server is up and running, execute the following commands in the newly created project's directory:
npm i
npm start
Now, you can access a working front-end server by visiting http://localhost:3000/.
Environment variables
Before considering the front-end part is ready for server usage, we must handle integration with environment variables. This will enable interaction with external services like Sentry and Google Analytics or implement various logic based on environment variables.
When using npx as a project generator, webpack's built-in plugins automatically read environment variables. If you have a different project type, conduct research. In some cases, the dotenv-webpack library may be useful.
To test the behavior of environment variables, you can add the following code to App.js:
<p>env: {process.env.REACT_APP_ENV}</p>;Back-end preparation
We'll use the modern NestJS framework for the back end, which seamlessly handles environment variables with the dotenv library and requires minimal configuration.
Before generating the project, make sure to install @nestjs/cli globally. You can find full instructions in the NestJS documentation; we will only use the essential commands for this example.
npm i -g @nestjs/cli
nest new awesome-startup-api
To ensure that everything functions correctly, run the following commands in the project's directory:
npm i
npm start
With the server up and running, you can send requests and receive the expected response:
curl http://localhost:3000Environment variables
Environment variables are essential in the backend because they allow us to connect to the database and external services and store various tokens. We used Webpack to build the framework, which ensures interaction with environment variables. As a result, no further action is currently required.
In the backend, environment variables are crucial in connecting to databases, external services, and storing tokens. We've configured Webpack to handle environment variables, so no further action is needed now.
Database Setup
A modern system can't operate without a database, so let's set it up locally. We'll use the object-relational mapping (ORM) described on Nest's framework page and implement the minimal configuration required to establish a connection. We'll run the database in a Docker Container instead of installing it directly on your local computer to keep things clean. If you haven't already, you can install Docker from here.
To create and run a database container, use the following command:
docker run --name postgres-awesome -p 5432:5432 -e POSTGRES_PASSWORD=superuser -d postgresNow, let's proceed with setting up the application and connecting it to the database according to the Nest framework's instructions. To do this, run the following command:
npm install --save @nestjs/typeorm typeorm pgWe'll add the following code to initialize TypeORM. In this example, we've removed the sslmode parameter when connecting to the database. This is because the TypeORM library, as per the documentation, fully handles SSL configurations, including SSL objects with certificates. Therefore, passing any SSL arguments, such as sslmode, can prevent establishing a secure connection.
For more detailed information, refer to native connection options.
// app.module.ts
import { TypeOrmModule } from '@nestjs/typeorm';

const url = new URL(process.env.DATABASE_URL);
url.searchParams.delete('sslmode');

TypeOrmModule.forRoot({
  type: 'postgres',
  url: url.toString(),
    ssl: process.env.CA_CERT && {
      ca: process.env.CA_CERT,
  },
}),
You can now launch the application to ensure everything is connected. If the connection is successful, you’ll get the following message:
DATABASE_URL=postgres://postgres:superuser@localhost/postgres npm startLOG [InstanceLoader] TypeOrmModule dependencies initialized +25ms
LOG [InstanceLoader] TypeOrmCoreModule dependencies initialized +58msRun the Prepared Code
To execute our prepared code, we'll utilize DigitalOcean, which aligns perfectly with our requirements and streamlines the application deployment process. Begin by signing up for DigitalOcean and proceeding to the next steps.
Please ensure you host your project on either GitHub or GitLab to continue.
Running the Front-end
Navigate to the DigitalOcean applications section and create a new application. First, choose your repository and select the main branch, which will automatically trigger the continuous integration (CI) process whenever changes occur.
Next, select a server resource plan. The most cost-effective option is sufficient at this stage, so opt for the $5 plan (512 MB RAM | 1 vCPU).
Finally, proceed to add environment variables. Follow the example mentioned above.
REACT_APP_ENV=devNow, pick the desired region, hit “Create,” and wait for the construction and launch procedures to be completed.

Once complete, we can visit the site using the link above to ensure that the environment variables and the application function.
Running the Back-end
To run the back end, follow a process similar to the front end example. Visit the DigitalOcean application page and, like before, create a new application. However, before finalizing, adjust a few parameters:
- Go to Settings and select your server component.
- Set the HTTP Port to match your server's port; in our case, the default is 3000.
- Modify the Run Command to
npm run start:prod.
At this point, the application should be up and running. However, it still needs a database connection. To create and add a database to your server, go to the app's page, and on the top right, click Create → Create/Attach Database.
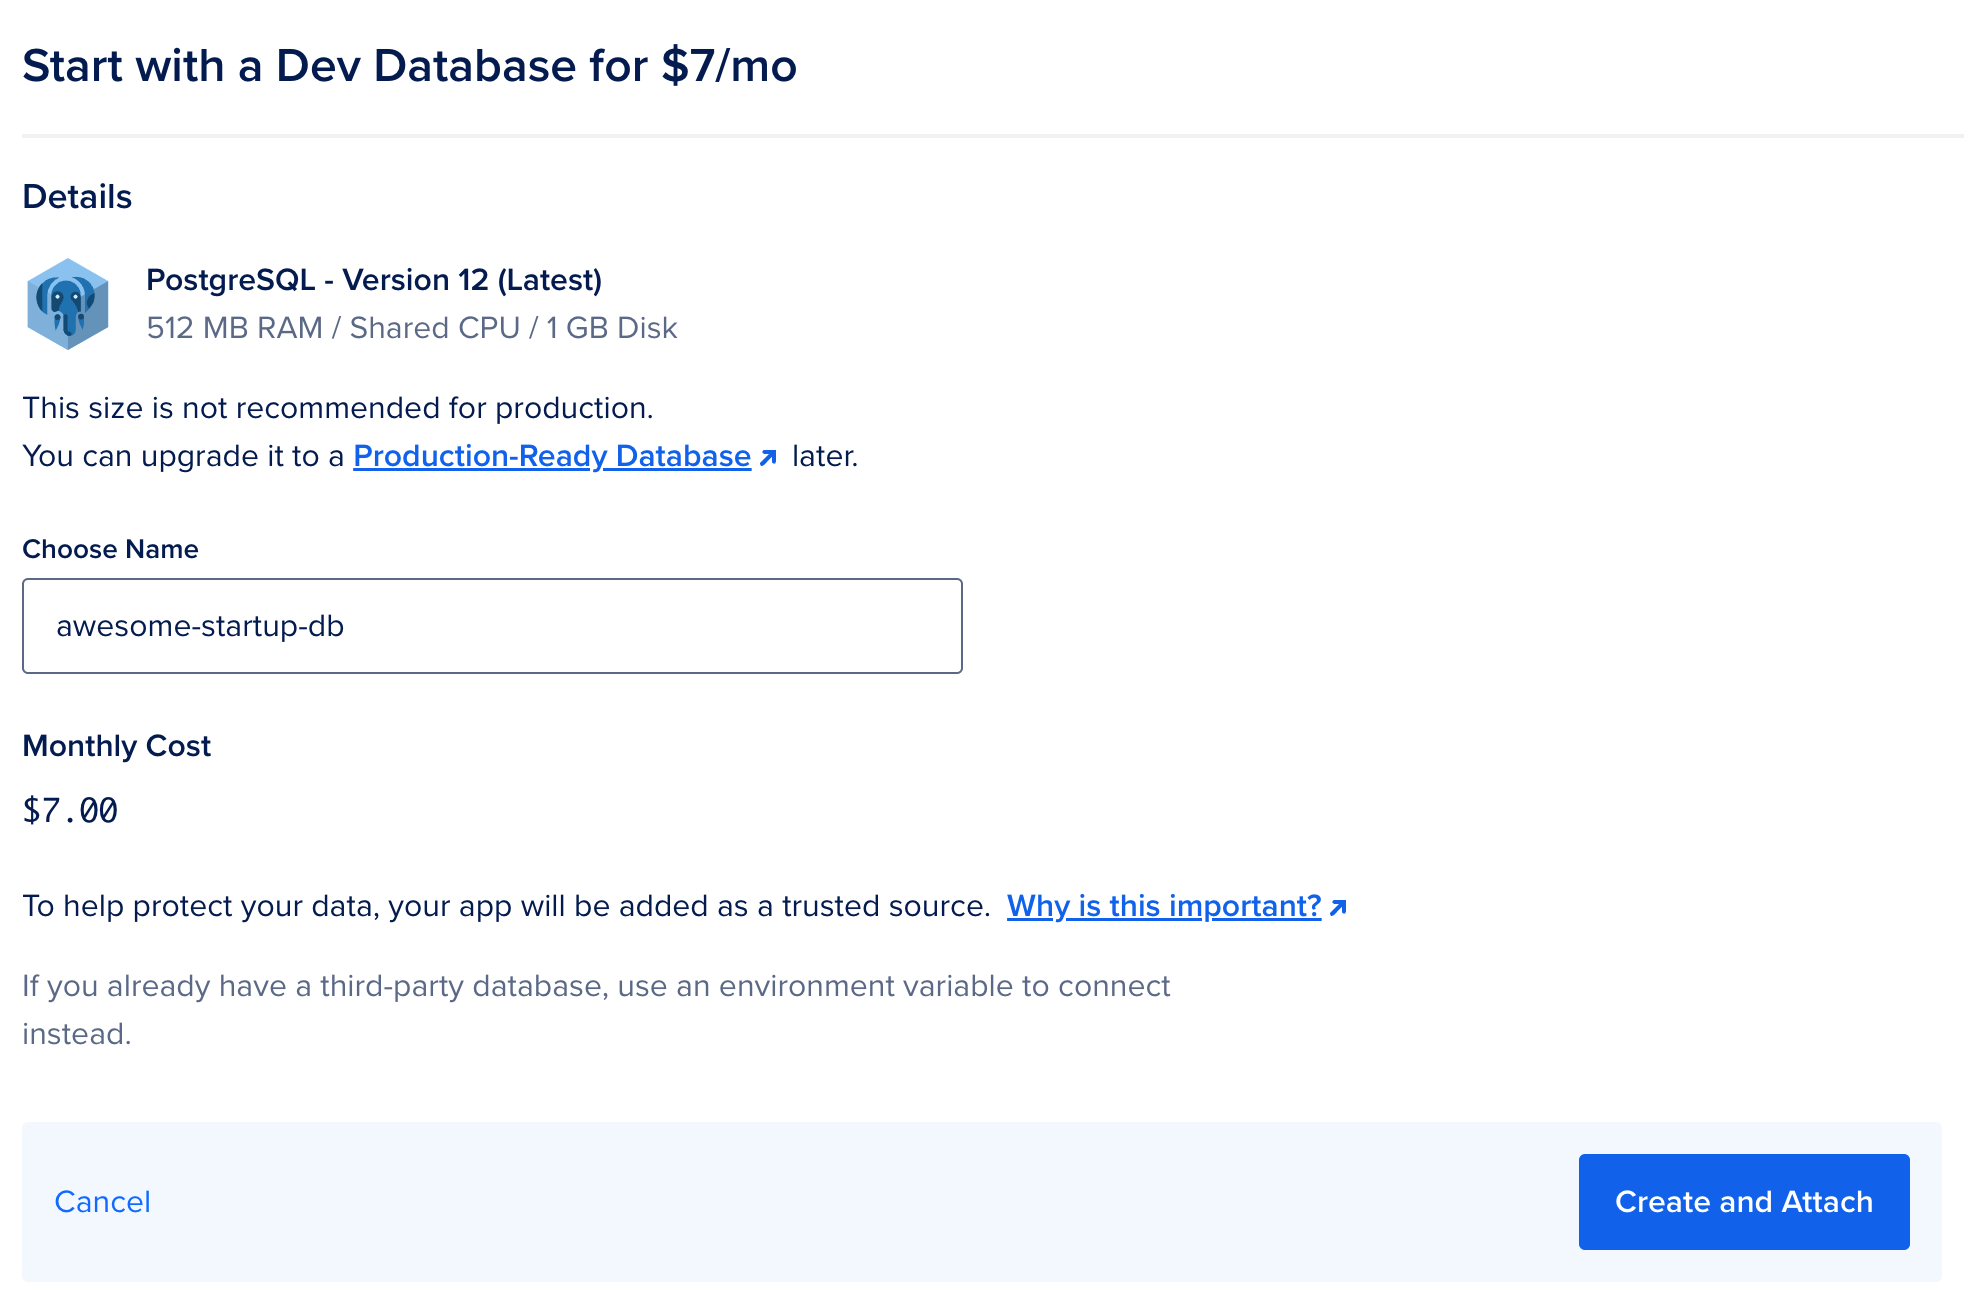
Now, enter the name (in the following examples, we will use the name "awesome-startup-db") and click "Create." Once the database is created, DigitalOcean will automatically add the DATABASE_URL variable to the environment.
One of the features of using applications on DigitalOcean is the ability to use component variables similar to regular class variables. Here are the variables you can use for the database:
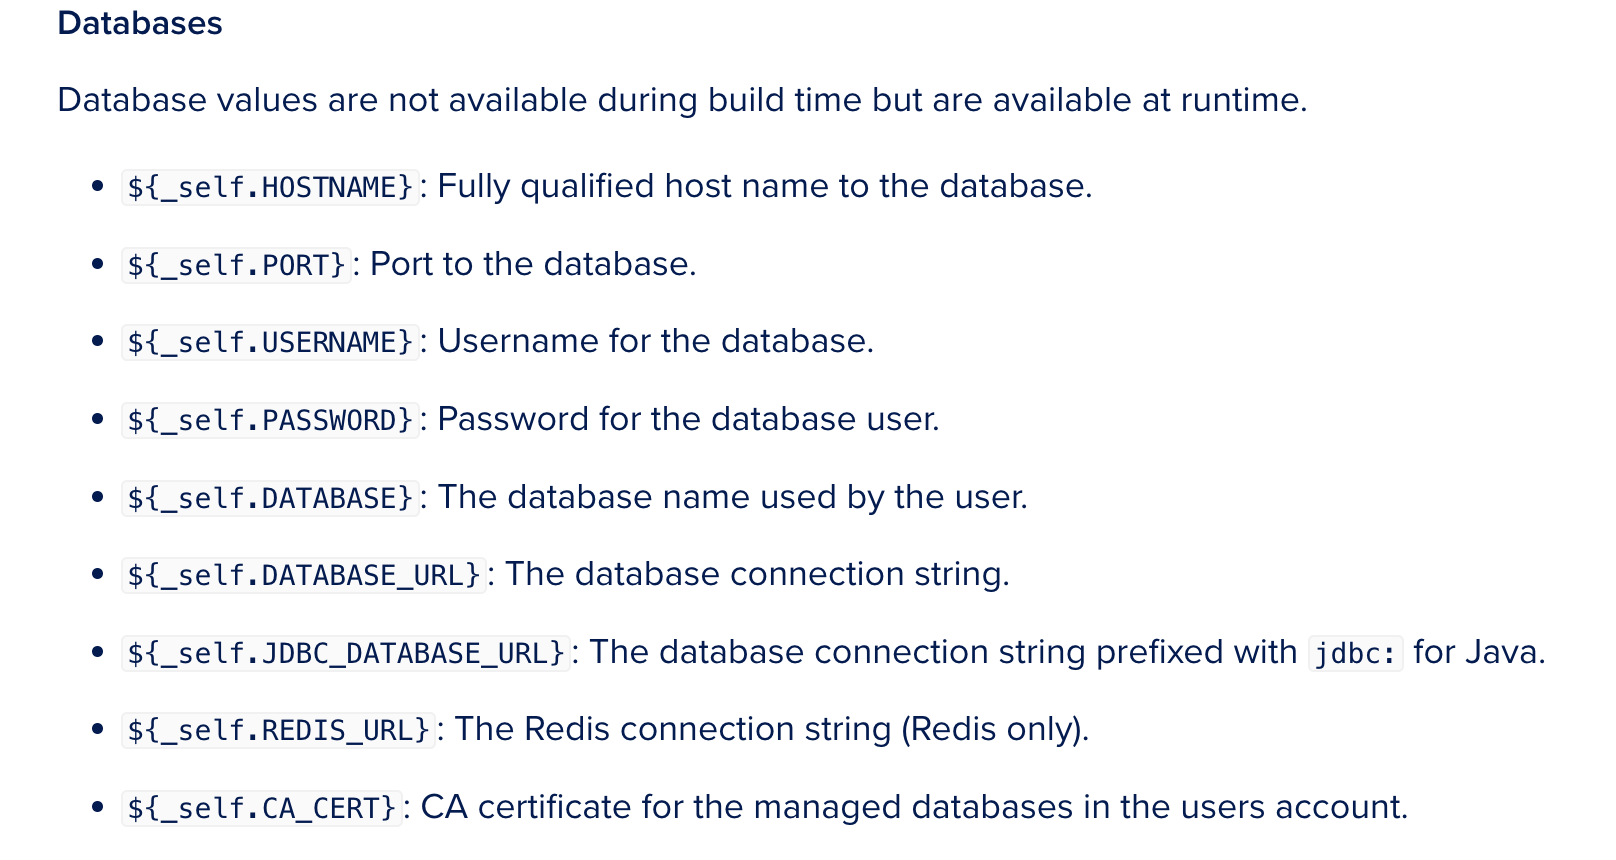
More variables and information regarding their use can be found on the documentation page.
To establish a safe connection to the database, let's add a CA_CERT variable with the value ${awesome-startup-db.CA_CERT}. The final version of the variables will look like this:
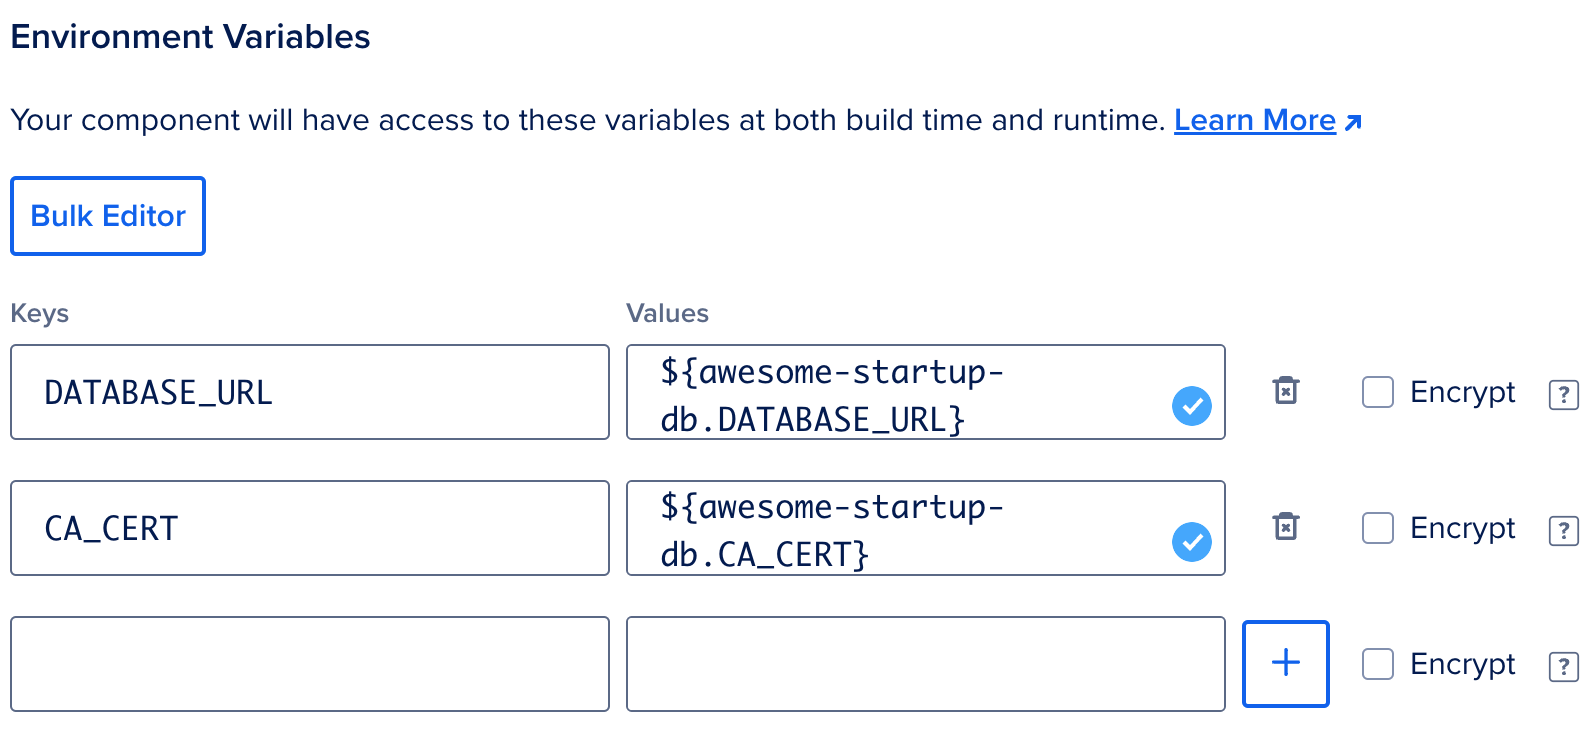
After making these changes, you'll need to wait for the build and run processes to complete. Once that happens, you can visit the website's address to verify.
What Else is Possible with DigitalOcean?
Now that we have both the front-end and back-end up and running, along with the database, it's time to explore the opportunities available and understand what's "under the hood."
At this point, I will no longer distinguish between the front-end and back-end; instead, I'll refer to each as an application because they are all applications on DigitalOcean. It's important to note that DigitalOcean has created a Docker Container for each of our applications and encapsulated them. Since these programs don't interact with the external setup of the machine and only have the necessary ports open, we can be confident in their security. You can find the configuration for this process on the settings page in the App Spec section, and you can learn more about it here.
App Health Check
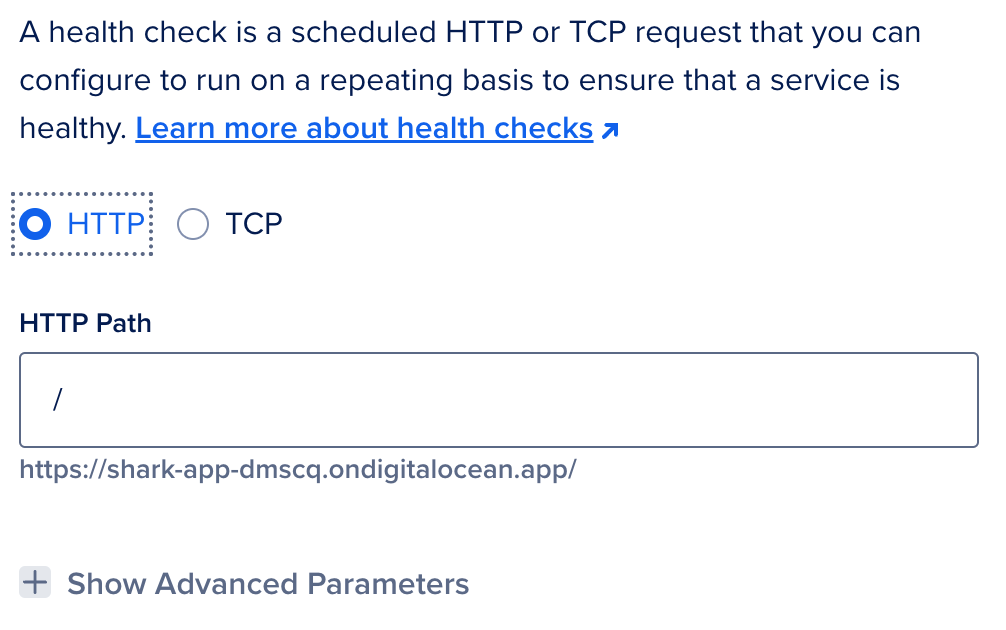
This function enables you to assess the status of the application. The standard check relies on the open port of our application: if it responds, the server is deemed operational.
For more detailed information on CPU, RAM, Network, and Restart Count, you can visit the Insights tab. Attaching additional components to the application, such as a database, automatically monitors them.

Furthermore, the status check can be adjusted and reconfigured in the component settings, for example, to HTTP.
Logs
You can access real-time logs for each component by navigating to the Runtime Logs tab. An example is shown in the image below:
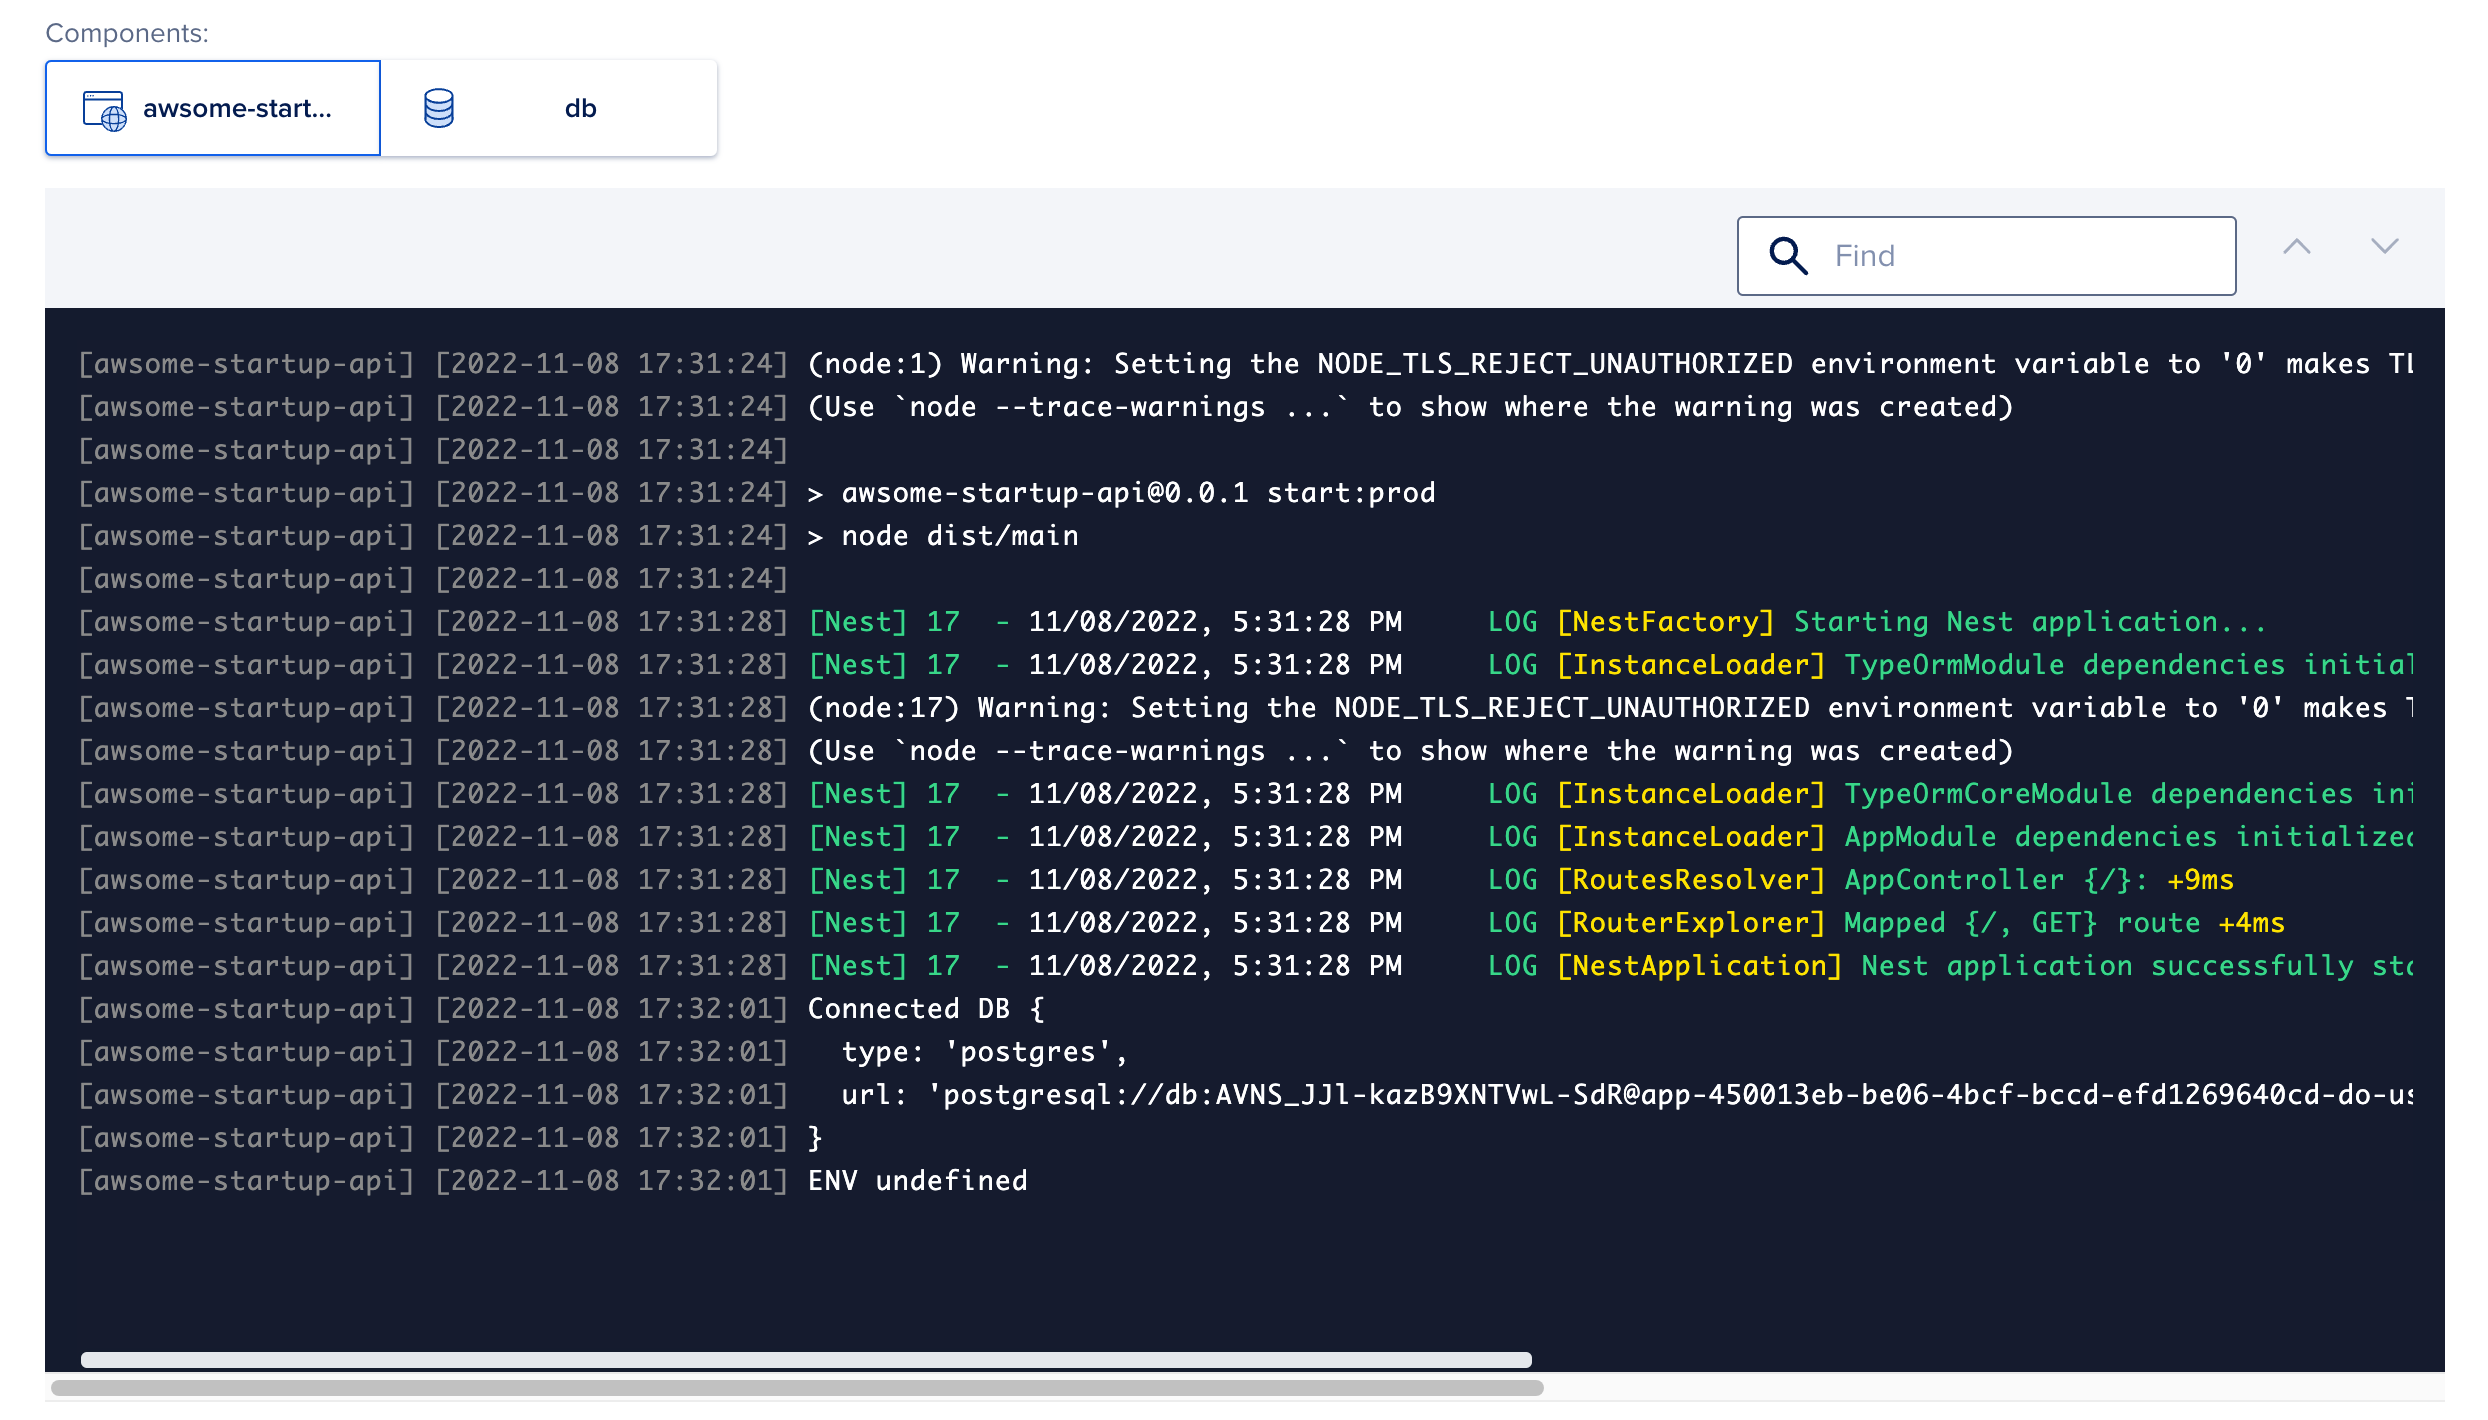
You can integrate with external log services such as PaperTrail, Logtail, and Datadog. This integration provides access to a wide range of filters, including those based on time zones and other features that significantly streamline the process of finding the necessary information.
Console
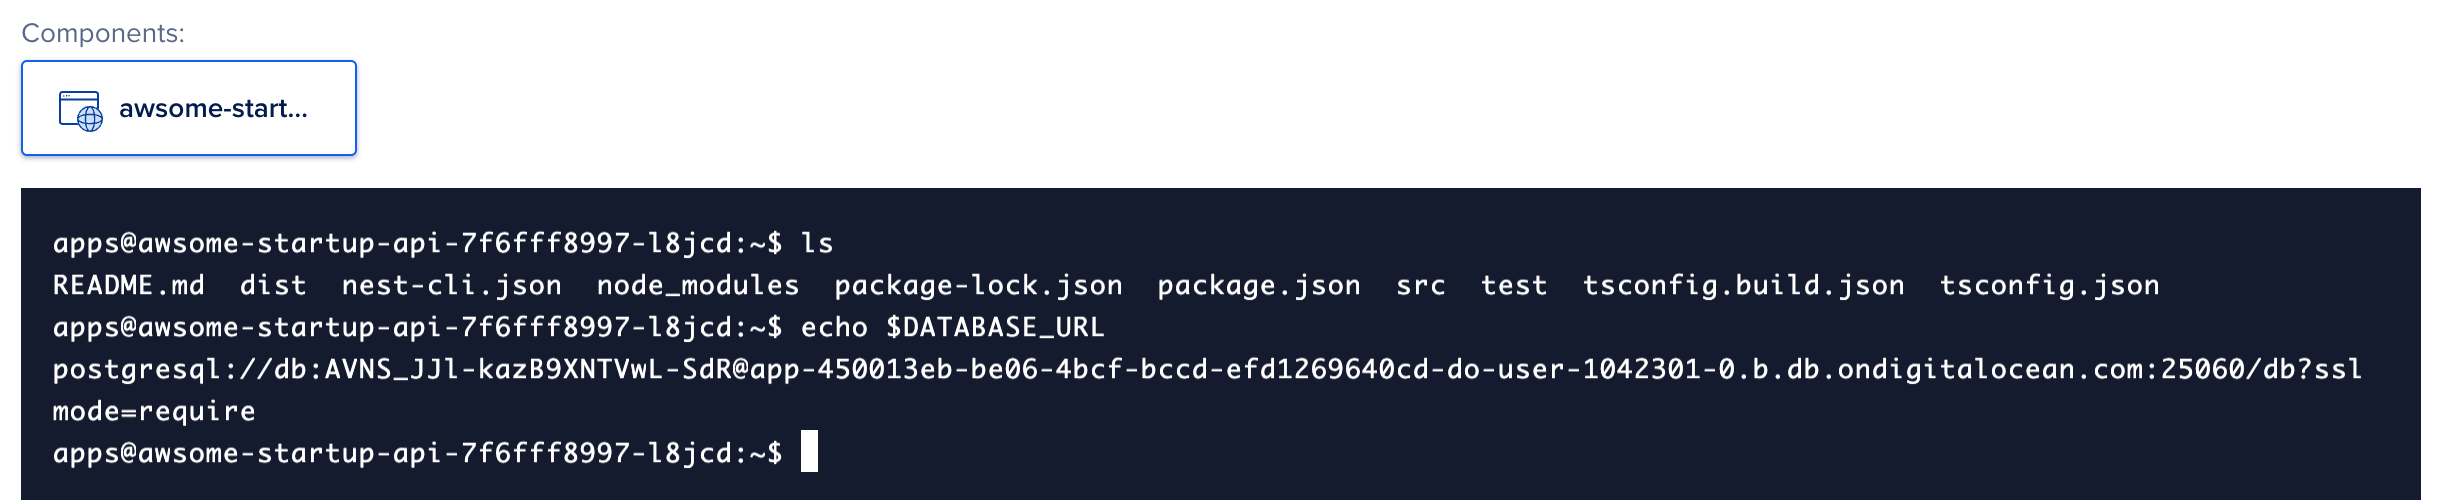
You also have direct access from the main screen to the Docker Container terminal, where your application is located. This can be incredibly helpful for troubleshooting.
For example, if you encounter an issue related to environment variables, you can use the echo command to check their values. Let's look at the value of the database connection address: echo $DATABASE_URL. See the result depicted in the image below.
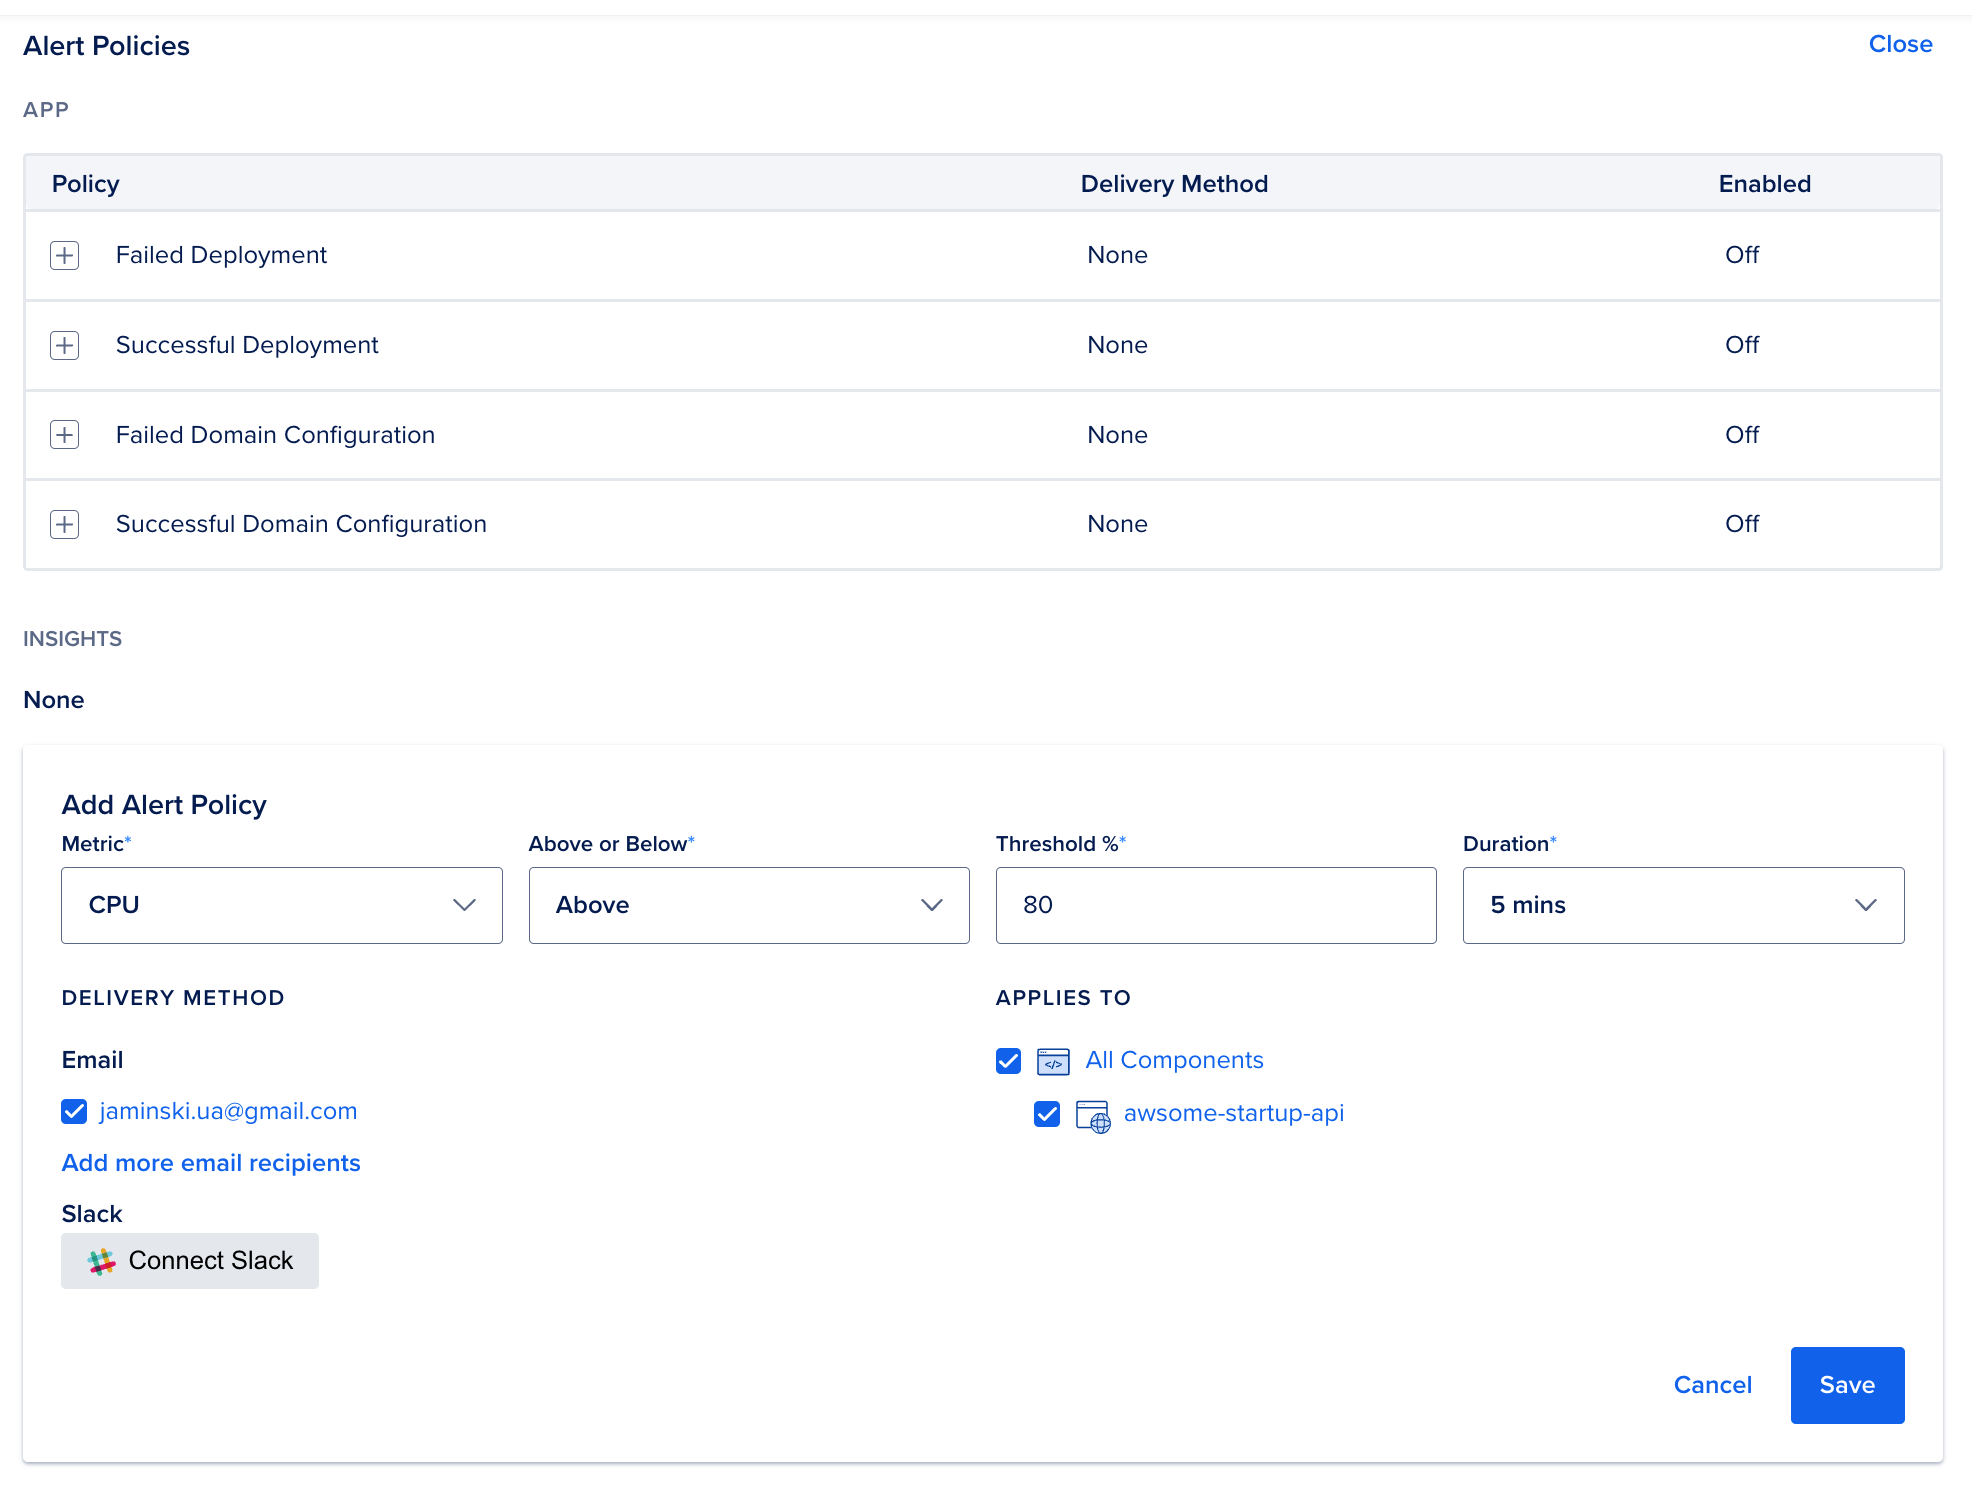
Alerts
The notification system is one of the most significant features. You can configure alerts for the deployment status after the most recent changes, whether it was successful or not. These notifications can be sent via email or a Slack channel. Workload-based notifications can also be set up.
For example, you will be notified if the CPU load exceeds 80% for 5 minutes. Here's an example of how it might look:
Environment Variables
You can add variables at both the application and component levels, such as front-end or back-end. An interesting feature is the ability to use variables based on component names in DigitalOcean. For instance, you can use the database reference obtained by invoking the database component like this: ${awesome-startup-db.DATABASE_URL}. You can find more variables of this type here.
Source
The source tab allows you to locate or modify the branch from which the project is built and launched. This section also provides the option to enable or disable the automatic start of the process.
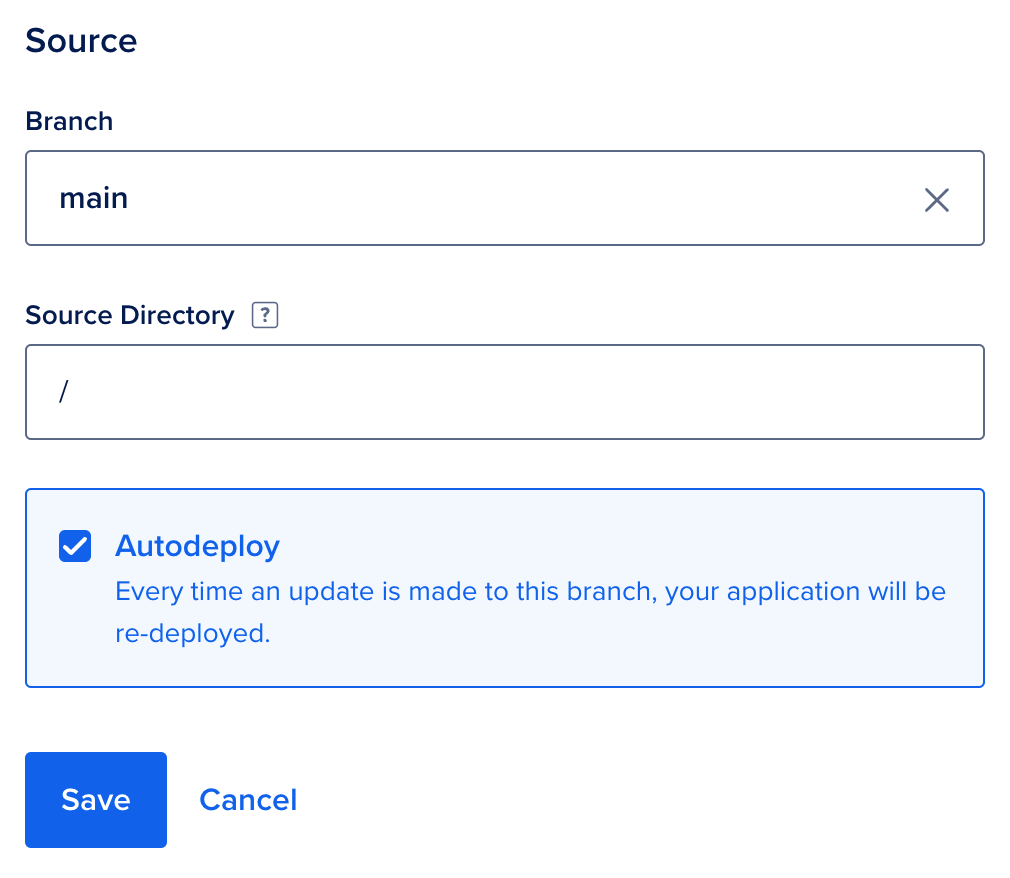
This enables us to separate apps for different environments; for instance, one branch can represent development, while another represents production.
Scaling
This section will assist us in identifying the optimal solution for our application's performance. We can configure notifications for high CPU usage and then, when needed, come to this section to allocate additional machine resources. It's important to note that for multiple containers to work seamlessly, the code must be prepared to run on multiple servers simultaneously.
Here's how you can set it up:

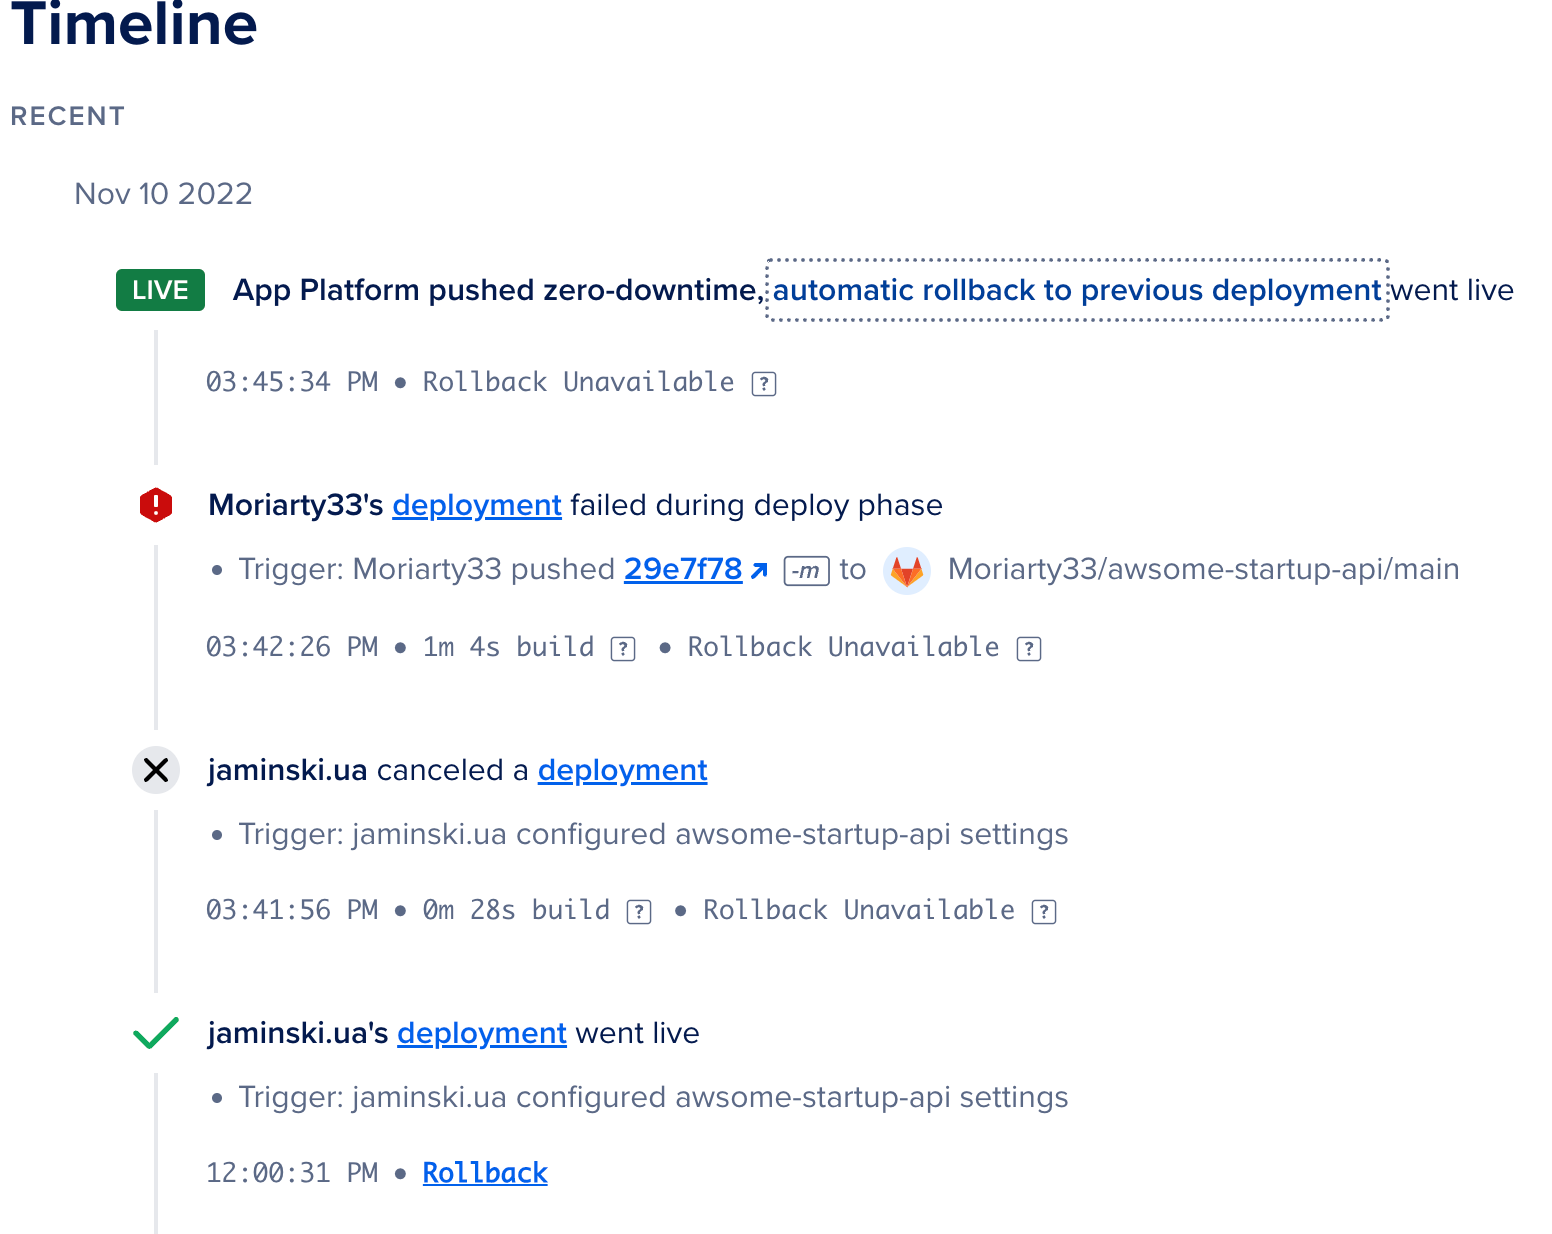
Activity
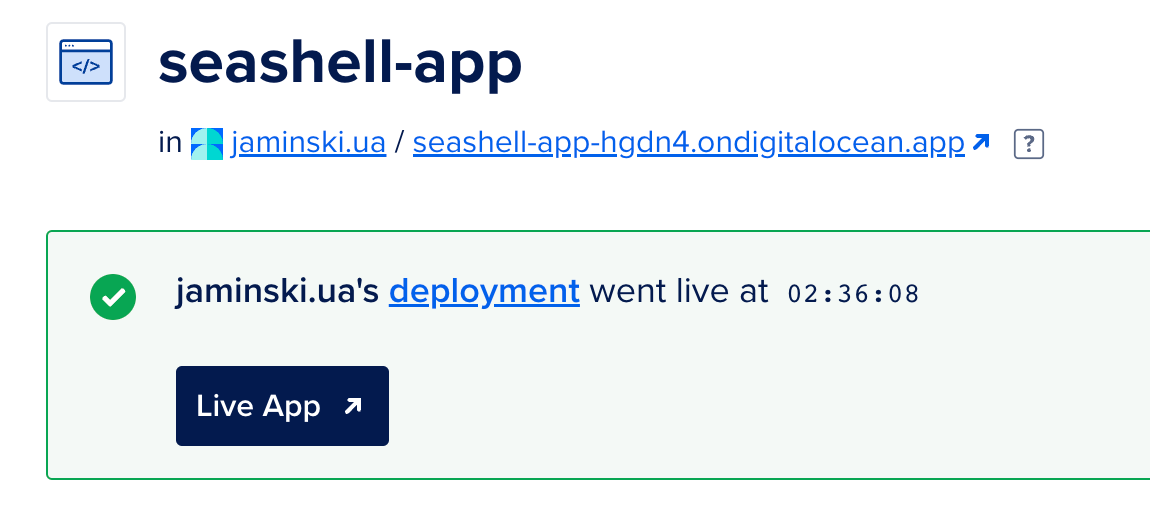
On this tab, you can access the event history, including changes in settings or new commits that triggered the deployment process. Detailed information is available, showing what was modified, who made the changes, the effectiveness of the deployment, and more.
There is a zero-downtime system during deployment, resulting in a visually quick release from the user's perspective. A rollback mechanism is also available, allowing you to restore to the previous working version. You can find more information on how to perform a rollback here: Rollback to a Previous Deployment.
The image below provides an example of how to perform a rollback to the desired version.
Database
You can easily add a database to each application by going to the main page, clicking "Create," and then selecting "Create/Attach Database." Once created, the connection's environment variable will be automatically added, as mentioned earlier.
It's worth noting that the database will be located in the same data center, significantly impacting your work's speed and security. The traffic between the server and the database will be limited to the same data center.
Furthermore, you have the option to upgrade the added database to a Managed Database. This is particularly important for the production environment, as it provides access to additional settings such as point-in-time recovery, database dump, advanced user menu, database tables, access control, and more. Database scaling is also a valuable feature, allowing you to set up multiple nodes and a backup node in case the primary one becomes unavailable (automated failover). These advanced features are seamlessly accessible through a user-friendly interface.
Other Settings
Several settings are straightforward but still quite useful, including:
- Commands: You can use various commands to create and run the application.
- HTTP Port: This is the primary port through which the Docker Container communicates with other machines. It should be configured to match the port on which your server operates. For example, for our Nest project, the standard port is 3000.
- CORS Policy: This setting allows you to impose different restrictions on incoming requests to your server.
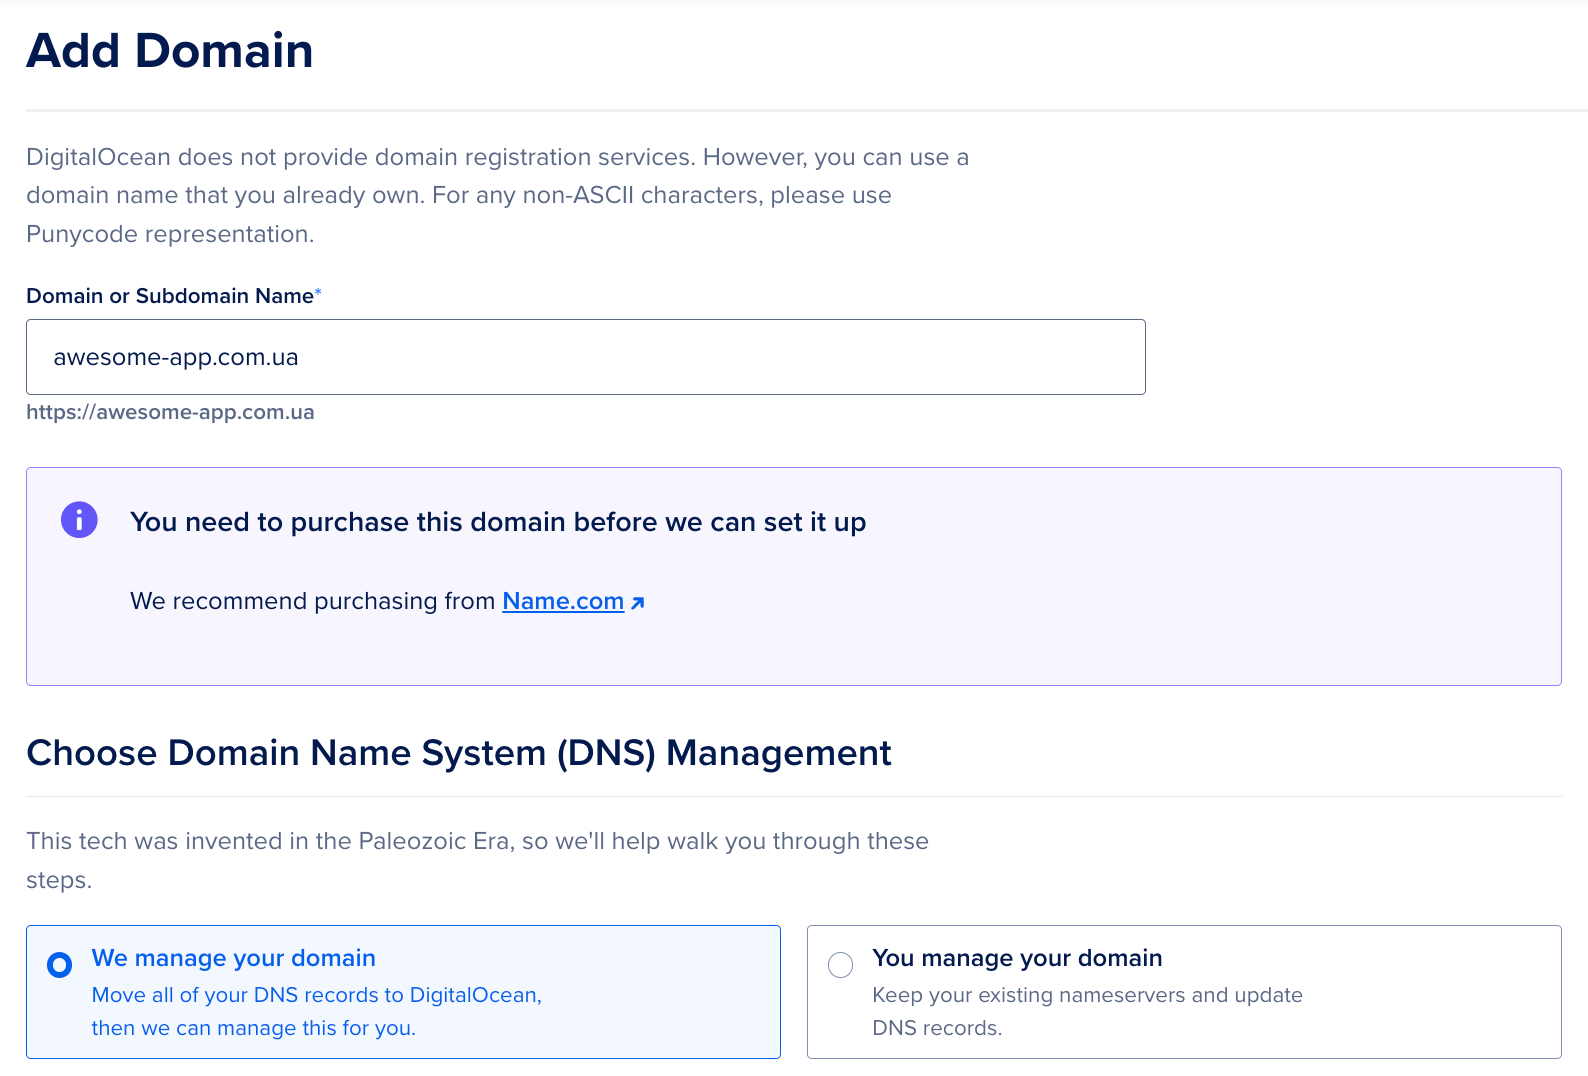
- Domains: Here, you can configure a Domain Name for your application. It's important to note that you cannot purchase a domain directly from DigitalOcean; you can only configure it to point to your server.

DigitalOcean recommends purchasing domains through name.com. Standard domains without high competition are typically priced up to $10 annually. For example, at the time of writing, a domain like exdevelopment.org is $8.99 for the first year.
Merging applications
It is also possible to merge applications into one. Merging applications is similar to adding a database: go to "Create" → "Create resources from source code." When merging, you'll need to configure the routes correctly. To do this, go to the settings of the back-end component → "HTTP Request Routes" and change it to /api. Then, go to the front-end component's settings and update the address in "HTTP Request Routes" to "/." After making these configurations, you should see a block containing the specified addresses on the application's Overview page. You can now switch to them and ensure everything works smoothly within the same application.
In Summary
Let's review our progress toward our goals and the associated costs.
Goal Achievement
Creating an application that fulfills our defined goals and deploying it to the production environment is a straightforward task with the assistance of DigitalOcean. It doesn't necessitate expertise in DevOps tools like Jenkins, Kubernetes, Docker Swarm, etc. The DigitalOcean service offers the following capabilities:
- Adding a database and ensuring a secure connection, all within a single data center.
- Incorporating and encrypting environment variables.
- Monitoring logs and accessing the console.
- Scaling application instances and databases to prepare for increased workloads, among other features.
All of these capabilities demonstrate that we can develop a fully functional application and partition it across different environments without requiring the expertise of a DevOps engineer.
Cost-Effective Solution
Achieving our goals comes at a cost of approximately $17 per month:
- Each of the two application components costs $5.
- Integration of a development database costs $7. When upgrading to the Managed Database version, the price increases by $15, reaching $25.
DigitalOcean does not provide domain name services but recommends name.com, where standard domains average $10 annually.
By leveraging DigitalOcean, you can effortlessly create a robust application environment across various stages without extensive DevOps knowledge. This streamlined approach empowers startups to swiftly launch projects, delivering impressive functionality and performance.


%20Let%20Complexity%20Kill%20Your%20Product_optimized.gif)


